
DisparaTimer: Guide.
App download:

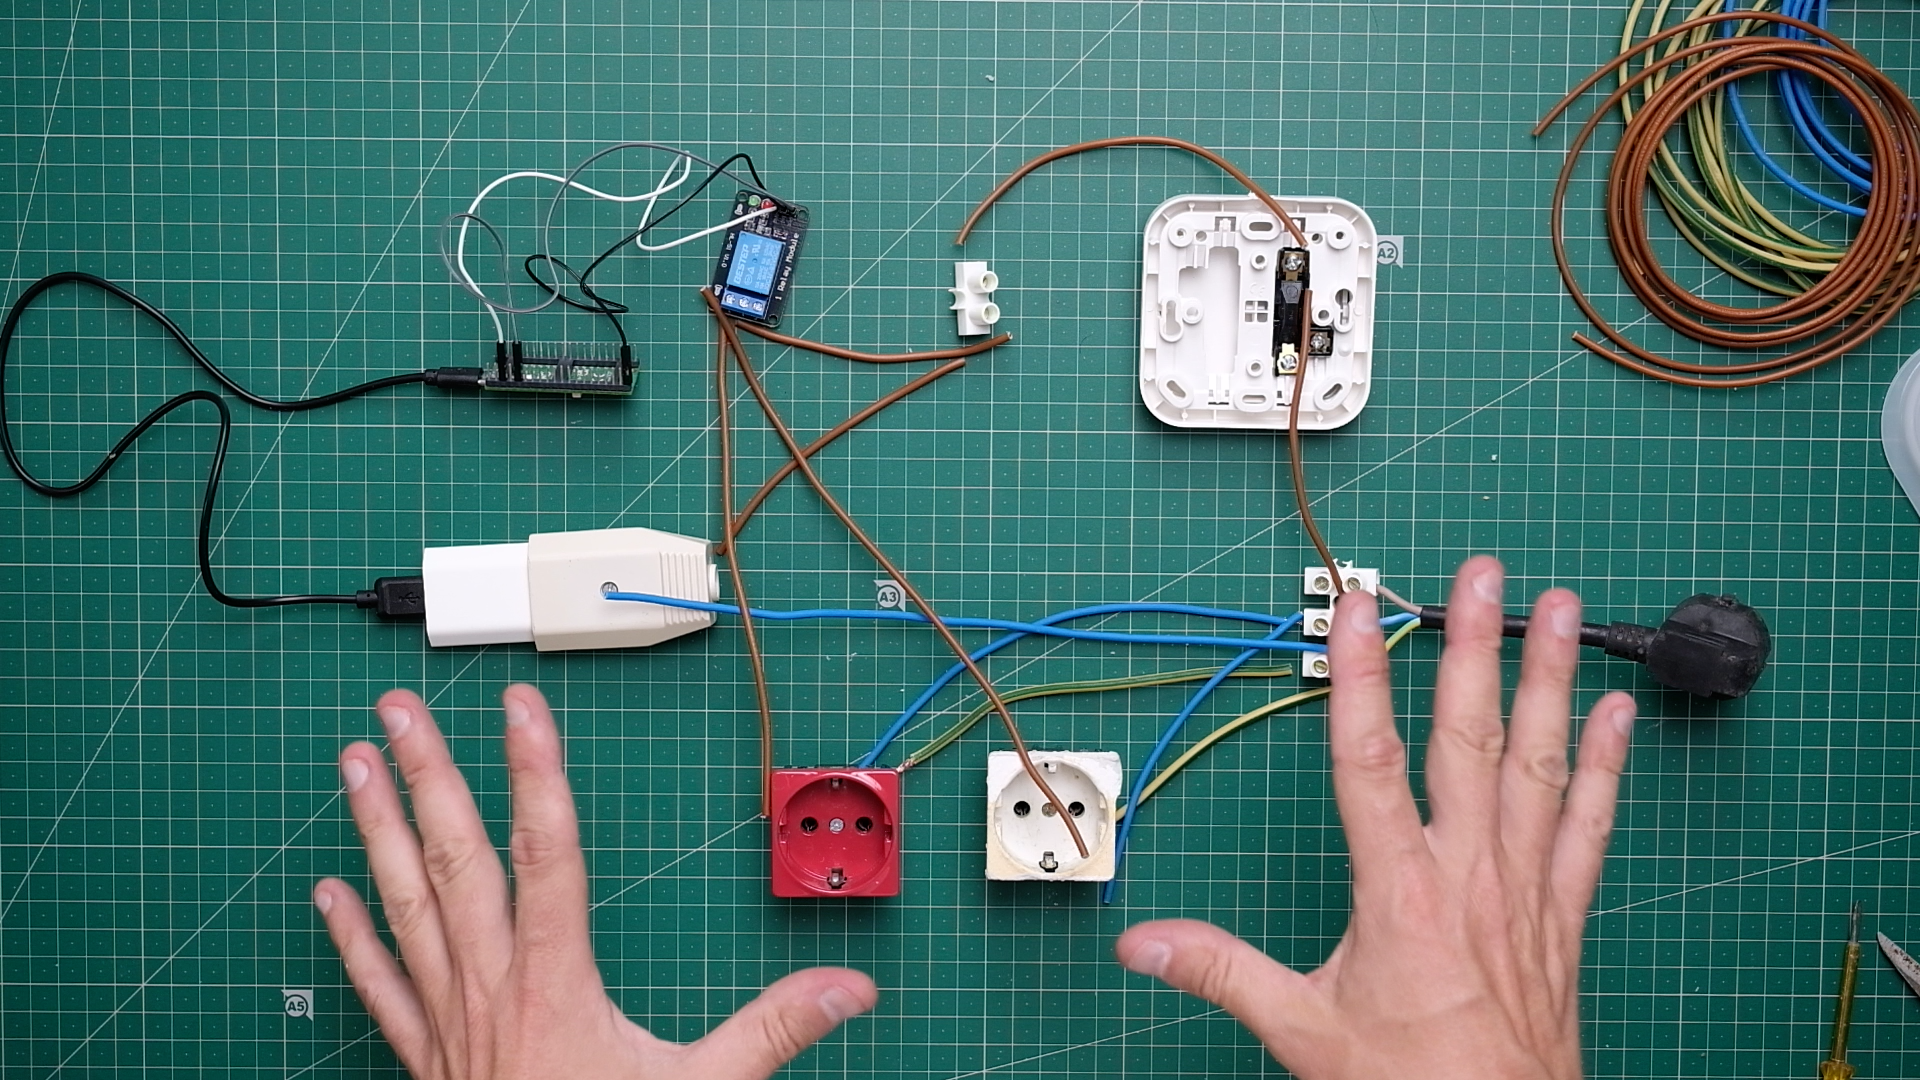
DisparaTimer assembly examples.
In the Spanish version of this page, you can find some examples of DisparaTimer assemblies.
Would you like to share your setup? Send us photos via email along with a brief explanation.
Bluetooth footswitch configuration.
You can trigger different buttons on DisparaTimer using a Bluetooth footswitch, like the ones musicians use to turn pages in their sheet music, along with a free Android app called Key Mapper. But why would you do this?
Maybe you're new to printing and find it difficult to adjust your vision to the red light, or you simply find it hard to operate a mobile phone. Pressing a Bluetooth footswitch with your hand is easier than using a phone screen.
Or perhaps you’ve been printing for a long time and prefer to have both hands free for dodging and burning. Pressing the Bluetooth footswitch with your foot can be a big help.
*Remember, an alternative to the Bluetooth footswitch is using the app’s delay feature!
We’ve tested a couple of footswitches: this single-button one and this two-button one. They work perfectly! In theory, any Bluetooth footswitch that connects to your phone should work


Configuration.
1. Connect the Bluetooth footswitch to your phone.
2. Download the Key Mapper app and follow the instructions to grant the necessary permissions. Without these permissions, it won’t work. This process depends on your phone model, so you’ll need to look into it.

Key Mapper app.
3. Press the “+” button in Key Mapper. We’re going to create the function that will be executed when you press the Bluetooth footswitch.
4. Now we’ll configure our trigger. Trigger is the term used for the triggering action, which in our case is pressing the footswitch. Make sure you’re on the “Trigger” tab in the top menu. Then, press the red button at the bottom (Record Trigger) and immediately press the button on the Bluetooth footswitch (the app gives you 5 seconds to press it). Your new trigger will appear in the list.
Press the button during the 5-second countdown.
The names that appear here vary depending on the footswitch you’re using.
5. Switch to the “Actions” tab in the top menu. Here we will configure what we want to happen when we press our Bluetooth footswitch. Press the blue button at the bottom (Add action). Since we want to simulate pressing the exposure button in the DisparaTimer app, select “Tap screen.”
This is the action that will be simulated when you press the footswitch.
6. Key Mapper will ask for the exact position of the exposure button. Since we don’t know it, we’ll need to upload a screenshot. To do this, open the DisparaTimer app and take a screenshot.
7. Return to Key Mapper, select the screenshot, and tap on the position of the exposure button. Two red lines will appear showing the exact point where you tapped. Make sure you tapped within the button; if not, tap again.
8. Press OK and give the button a name, such as “START”.
9. We’ll add a condition so that this Trigger only works with the DisparaTimer app. Go to the “Constraints” tab and press “Add Constraint.”
10. Select “App in foreground” and then choose “DisparaTimer.”
Our Trigger will only work when DisparaTimer is in the foreground.
11. Tap the disk icon and then “Confirm” to save everything you’ve done, and return to DisparaTimer.
All set! When you press the footswitch button, the timer should start.
Oh, and remember to charge the footswitch at the end of each printing session!
Dual Footswitch.
If you have a dual footswitch or any Bluetooth controller with more buttons, you can configure additional DisparaTimer buttons. Just add another trigger by repeating steps 3 through 11 for each button. Here’s my favorite setup for my dual footswitch:
Left button for focusing light.
Right button for the exposure button.
Double press on the left button for Reset. To change the behavior of the button from a single press to a double press, switch from “Short press” to “Double press” in the “Trigger” tab (step 4 of the list).
*Note: Double press may not work on all footswitches!
**Double pressing introduces a slight delay compared to a normal press, which is why I haven’t applied it to the exposure button where I want instant response.
Change from “Short press” to “Double press”.